
Microsoft has some strict hardware requirements that your PC must meet in order to install Windows 11, such as TPM 2.0 support. This means that not only the old computer, but also the virtual machine refuses to upgrade from Windows 10 and displays the message “This PC does not currently meet the system requirements for Windows 11.”
Fortunately, there are some easy ways to bypass the Windows 11 TPM, RAM, and other requirements. If you are performing a clean installation using the Windows 11 ISO, you can instruct the registry to be edited and skip the requirement check during the setup process. The first section below describes how to modify the registry.
If you don’t need to modify the registry during the installation, you can create a Windows 11 USB installation disc that bypasses the Windows 11 TPM requirements and the need for 8GB of RAM and a supported CPU. You can use a free tool called Rufus and a flash drive of at least 16GB to perform an in-place upgrade from Windows 10 to 11 or a clean install of Windows 11 while avoiding these minimums. The second section of the tutorial below shows you how to use Rufus to create a requirement-free Windows 11 installation disc.
If you have Windows 10 or a previous build of Windows 11 installed on a PC that doesn’t meet the requirements (probably a VM) and you try to update to a new build using Windows Update, you’ll get a “Not meet the requirements” message. Will be done. “There is an error message, a workaround. As detailed in the third section below, you can use the script on the github page of AveYo’s media creation tool to meet the TPM requirements for Windows 11 even if you are using Windows Update. You can bypass it.
Note that Microsoft has also created an official registry hack to bypass TPM 2.0 and CPU requirements for in-place upgrades. However, this method requires at least TPM 1.2, so it doesn’t make sense if you don’t have a TPM at all. This is explained at the bottom in case you want to try it out.
Also note that by default, Microsoft’s OS requires you to set up with your Microsoft account. However, there is another tutorial on how to install Windows 11 without a Microsoft account using some tricks.
How to use a registry hack to bypass Windows 11 TPM requirements
If you are using a regular Windows 11 installation disc or ISO, you can work around the Windows TPM and RAM requirements by modifying the registry during the installation. Note that this method only works for clean installations and at least does not bypass the requirements for dual core CPUs.
1.1. Boot from the Windows 11 installation disc.. If you don’t have one, see the story about how to download Windows 11. The first screen will ask you to select the language of the installation (probably correct).

2.2. Press SHIFT + F10 Start a command prompt.

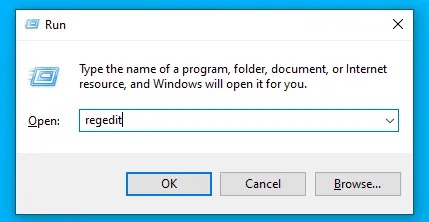
3.3. Type regedit Press Enter to launch the Registry Editor.

4.4. invite HKEY_LOCAL_MACHINE \ SYSTEM \ Setup.

5.5. [設定]Create a new registry key with When Give it a name LabConfig. To create a registry key, right-click in the right window pane and click[新規]->[キー]Choose. Then enter the key name.

6. WIthin LabConfig, Create a DWORD value called BypassTPMCheck When BypassSecureBoot When Set each to 1.. To create a new DWORD value, right-click in the right window, select the new DWORD (32-bit) value, name the key, double-click it to open it, and set it to 1.

If you also want to bypass RAM requirements Add the DWORD value of BypassRAMCheck..
7. Close regedit And that command prompt..
You should be able to continue the Windows 11 installation as usual.
How to use Rufus to bypass Windows 11 TPM requirements
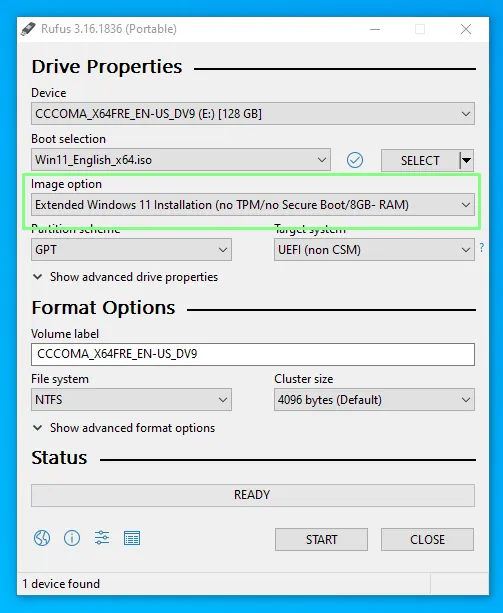
Rufus, a free utility, allows you to create a Windows 11 installation disc on a USB flash drive with a setting that disables the TPM, RAM, and CPU requirements. You can boot from this USB flash drive to perform a clean installation of Windows 11 or run a setup file from the drive from within Windows 10 to perform an in-place upgrade.
While this method is ideal for most people, it has some drawbacks. First, you need a USB flash drive of 16GB or more. Second, because it’s on a flash drive, the ISO files are more difficult to use to install Windows 11 in an ideal virtual machine.
1.1. Download the latest version of Rufus Install it on your machine. The latest version at the time of writing is 3.19, which includes support for extended Windows 11 images.
2.2. Insert an empty 16GB or larger USB stick Then open Rufus.
3.3. Select a USB device Target for installing Windows 11.

4.4. Make sure you see “Disk or ISO Image” in your boot selection When [ダウンロード]Click..
![[ダウンロード]Click](https://cdn.mos.cms.futurecdn.net/fvbC7FWctXXRp73dozddAM-1200-80.png.webp)
5.5. Select Windows 11 When [続行]Click.

6.6. Please select the latest release When [続行]Click..

7. Select edition When [続行]Click..

8.8. Select your preferred language When [続行]Click..

9.9. Choose an architecture (Probably x64) and [ダウンロード]Click.. A new window will open asking where to save the ISO image. Save to download folder.. If you prefer, you can also use your browser to download the images.

It will take a few minutes for the download to complete.

10.10. [画像]Click the option dropdown When Select Enhanced Windows 11 Installation Disable TPM, secure boot, and 8GB RAM requirements.
11.11. Double check that the correct drive is selected When [開始]Click The installation will start.

Depending on the USB drive you are using, the burning process may take some time, but when you are done, you can remove the drive and use it to install Windows 11 on your old computer or virtual machine.
12.12. Install or upgrade Windows 11.. If you want to perform an in-place installation from an existing Windows 10 installation, run the setup on a USB drive. If you are doing a clean install, boot from the drive. Keep in mind that if you encounter problems, you may need to disable Secure Boot in the BIOS (see How to Boot the BIOS).

How to bypass Windows 11 TPM check from Windows Update
If you use Windows Update instead of creating an installation disc, you need a method that runs on Windows and tricks the updater into making you think it meets your requirements. This can be even more important if you are using Windows Update to upgrade to a new build of Windows 11 (probably an insider build) on a computer that has already bypassed the requirements.
For example, when I joined the Windows Insider program on one of the Windows 11 VMs (apparently without a TPM), I got the horrifying error “Your PC does not meet the requirements”. However, using the workaround script in AveYo’s media creation tool solved the problem. Here’s how to do this:
1.1. Go to Skip_TPM_Check_on_Dynamic_Update.cmd Source code for AveYo’s media creation tool Github.
2.2. Click the “Copy Raw Content” button Located in the upper right corner of the code box.

3.3. Create a new file on your desktop When Name it skip_tpm_check.cmd.. Make sure you can view the file extension and that the file extension is actually .cmd instead of .txt. Otherwise, the file extension will not be executed.

4.4. Open skip_tpm.cmd When editing using Notepad or another text editor.
5.5. Paste the code I copied it from github.

6.6. Save and run skip_tpm.cmd file.
7. [はい]Click When prompted by User Account Control.
![[はい]Click](https://cdn.mos.cms.futurecdn.net/baezKGiURDNpSEpsGXTqJ9-1200-80.png.webp)
A message appears stating that “Skip TPM with dynamic update” has been installed. Running the program again will disable the utility.

Now you can use Windows Update to update your existing Windows 11 builds or upgrade from Windows 10 to 11.
How to bypass Windows 11 TPM with the official Microsoft method
Knowing that some users want to install Windows 11 on systems that don’t meet all of their hardware requirements, Microsoft has provided a registry hack that loosens them somewhat. This hack can be installed on systems with TPM 1.2 and above and unsupported CPUs. However, the above script does not require a TPM, so we recommend it.
1.1. Open Regedit..
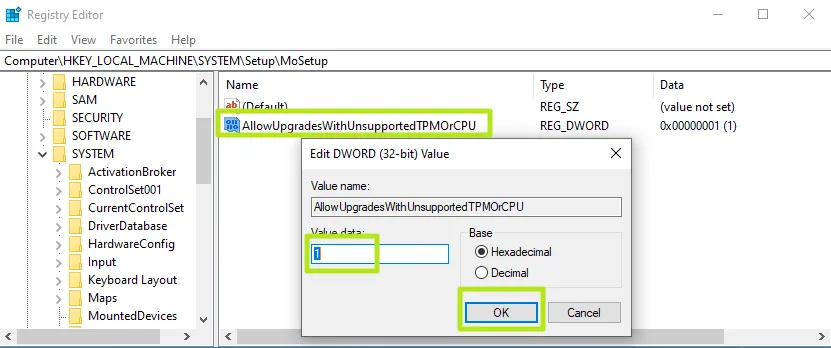
2.2. Go to HKEY_LOCAL_MACHINE \ SYSTEM \ Setup \ MoSetup..

3.3. Create a DWORD (32-bit) value called AllowUpgradesWithUnsupportedTPMOrCPU If it doesn’t exist yet.
4.4. Set AllowUpgradesWithUnsupportedTPMOrCPU to 1..
5.5. Close regedit When Restart your PC.. You can now upgrade to Windows 11 from within Windows 10 using the installation media (if created).
Other Windows 11 Tutorials:


