
The zip file format has been a computing powerhouse since 1989. Developed by PKWare Inc, zip archives are a convenient way to transfer large files or groups of files. Originally distributed via PKZip, zip functionality was added to Microsoft Windows via Windows ME (installable via the Windows Plus! add-on for Windows 98).
Zip archives are useful for long-term file storage and to save bandwidth when transferring files to remote locations. In this how-to, learn how to use Windows 10 (and Windows 11)’s built-in zip tool to create, manage, and extract zip archives.
How to create a Zip file in Windows
Creating a zip on Windows is easy. Windows has built-in support for Zip archives, so you don’t need a copy of WinZip anymore (has anyone activated a trial?).
To create a zip archive on Windows.
1. Highlight the files you want to compress.
2. right click[圧縮 (zip 形式) フォルダーに送信]Choose.

3. A new zip archive will be created. Rename the file to reflect its contents.

Adding and removing files from zip files
A zip archive can be updated with additional files or files can be removed from the archive.
1. Double-click the zip archive file. This will open the archive as if it were a folder.
2. To remove a file from the archive, right click[削除]Choose. This will remove the files from the archive, but not the original uncompressed files.

3. To add files, Select files using Windows Explorer When Drop it into an open archive.
Extracting files from a zip archive can be done for single, multiple or all files.
1. Double click zip archive.
2. left click When Drag the files from the zip archive to a folder on your computer.
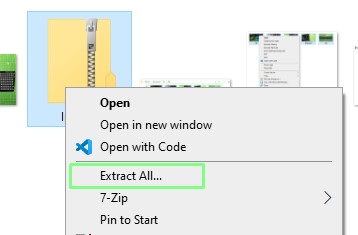

2. Select the destination folder,[抽出]Click.

3. The destination folder will open and the extracted images will be displayed.


