
Taking your first steps into the Linux world can be a daunting proposition.After all, we have a whole new world terminal command, desktop environments, and applications to learn. Thankfully, Linux installation has improved dramatically from the early text-based installers used in the late 1990s (Debian and Slackware) to the graphical installers of the early 2000s (Corel Linux, Mandrake). rice field. Since the 2010s, we’ve seen better graphical installers that provide peace of mind when testing Linux.
The first steps into Linux fall into two paths.Single board computers such as raspberry piOr, more traditionally, a dual boot setup where Windows and Linux are installed on the same machine (often the same boot drive). Custom Boot Menu GRUB allows you to choose between two operating systems when you turn on your PC.
In this how-to, learn how to dual boot Linux on Windows using Ubuntu and Windows 11. The steps are the same for Windows 10 and Windows.
Creating a Linux installation USB
Our Linux distributions are usually downloaded as ISO images (ISOs were originally called CD/DVD sized images) of live Linux OSes that we can test on our machines. To use the ISO with a UEFI / Secure Boot system, you need to use Rufus. Rufus is a popular free utility to burn ISO files to USB flash drives.
Our goal is to create a bootable USB stick containing the Linux OS of your choice. A USB drive of 8GB or larger is recommended.
For this project you will need
- Computer running Windows 10 / 11 (tested on Windows 11)
- USB flash drive, 8GB or more
- Linux distribution (select Ubuntu)
1. Download and install Rufus for your operating system.
2. Insert the USB drive into your machine When Open Rufus.
3. Select the USB drive using the device, When next[選択]Click to select the Linux OS you want to install. In our case it was Ubuntu 22.04.1.
Four. Select GPT partition scheme,[開始]Click to write the OS to the USB drive. GPT is a modern partitioning scheme and is required for installing Ubuntu on UEFI systems. It’s gradually replacing the MBR.

Five. Select “Burn in ISO image mode” when prompted. When [OK]Click.

6. Read and understand the prompts to ensure the Linux OS is written to the correct drive. You can’t go back even if you make a mistake.

7. [閉じる]Click to exit Rufus and remove the USB drive from your machine.

How to install Linux for dual boot
Linux installers have come a long way. Gone are the old days of horrible user interfaces, and in their place are attractive, easy-to-use installers to guide you through the process. Split a 256GB NVMe drive in half using the Ubuntu 22.04.1 installer. Give Windows and Ubuntu enough space for a basic dual boot installation. Then follow a typical Ubuntu installation.
1. Insert the USB drive into your computer and boot from it. Each computer is slightly different. Some provide function keys to select the boot device, others require selection from the BIOS.
2. Select “Try or install Ubuntu” from the GRUB menu (or your Linux OS of choice) and Press Enter. The GRUB menu is a custom boot menu used by Linux devices.it can also Customize to display a background image.

3. When prompted, click Try Ubuntu to load the OS into RAM as a “live distro”. A live distribution gives you enough operating system to test it on your machine without making any changes to the system. It can also serve as a recovery device to boot broken computers.

Four. Test your hardware to make sure everything you need is working. Check audio, Wi-Fi, Bluetooth, etc. before proceeding.

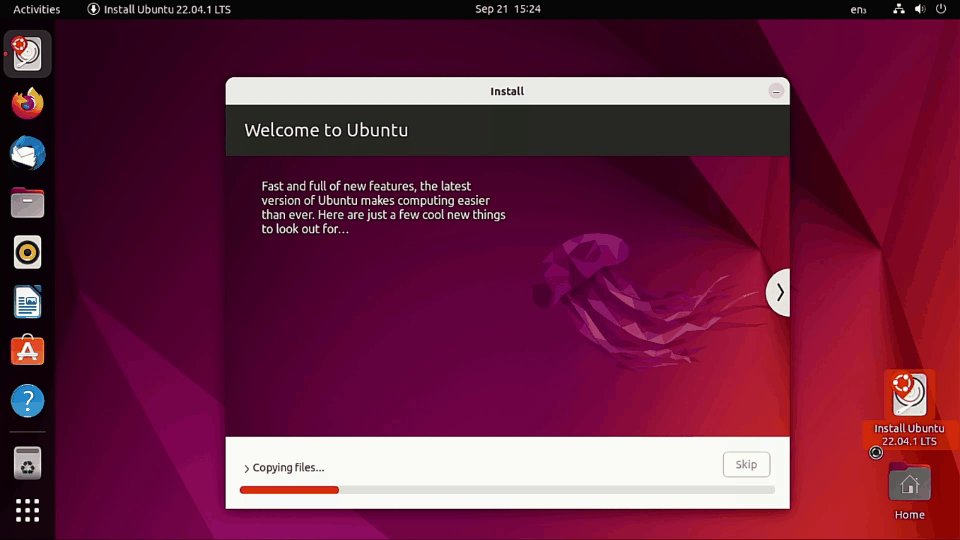
Five. Double-click the install icon to launch the installer application.

6. Please select the language you use When [続行]Click.

7. Choose your preferred keyboard layout When [続行]Click.

8. Select normal installation Optionally install third-party software, then [続行]Click. Third-party software includes drivers and applications that may not match permissive licenses used by Linux distributions. Check your chosen Linux OS website for more information.

9. Select “Install Ubuntu with Windows Boot Manager”. When [続行]Click. Other options require you to delete the entire contents of the drive or manually configure it, so be very careful.

Ten. Make sure the correct drive is selected. When Slide the middle slider to adjust the free space for each OS.

11. [続行]Click Write changes to disk. Make sure everything is correct before proceeding. The changes you just made cannot be easily fixed.

12. [続行]Click Is it OK? When asked.

13. Set your current location When [続行]Click.

14. set up a user account, Use your real name, computer name, username, and provide a strong password. [続行]Click After finishing your preperations.

It will take a few minutes for the installation to complete.
15. [今すぐ再起動する]Click to restart your computer.

16. Remove the USB drive and press enter when prompted.

First Linux dual boot
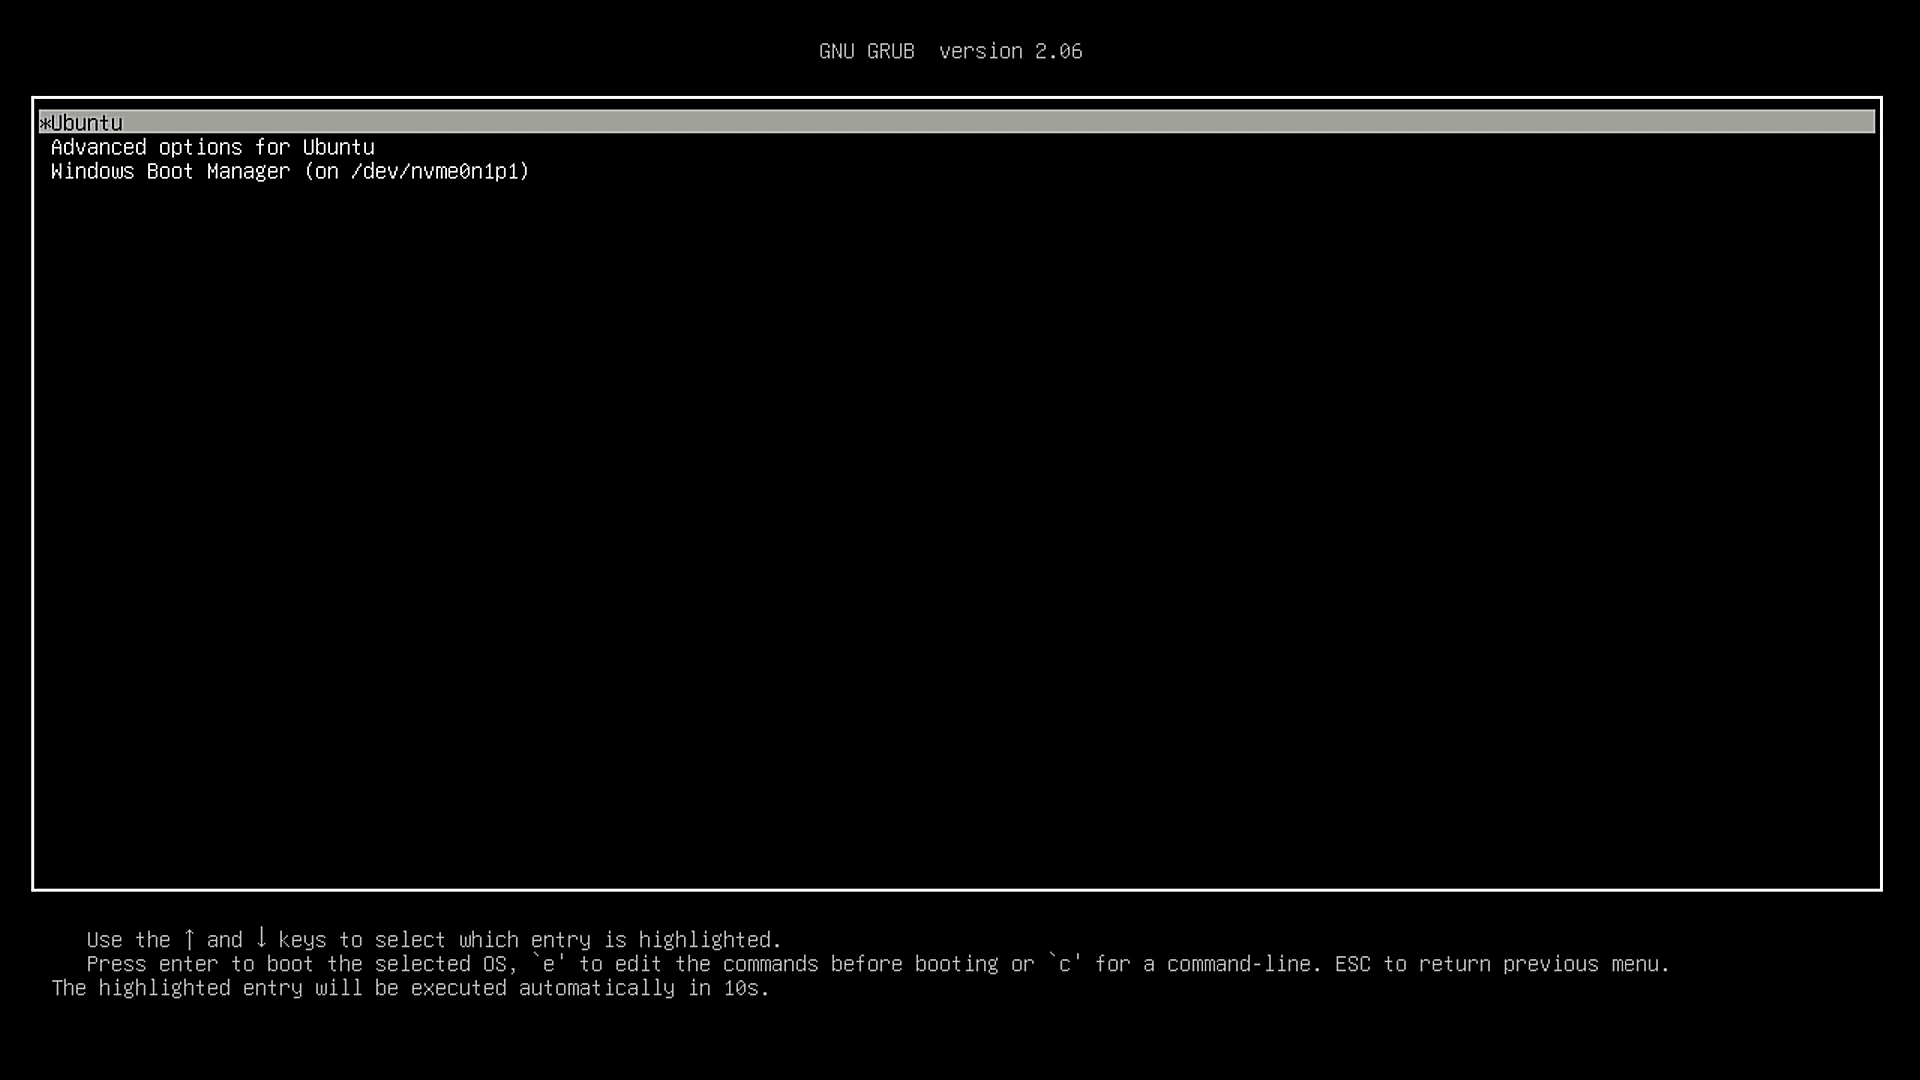
The first boot of a Linux dual boot system requires a BIOS tweak. You need to tell the system to boot from your Linux installation. This will load the GRUB menu. From there you can choose which OS to boot. Each BIOS is slightly different, so use these steps as a general guide and refer to your motherboard manual for more specific information.
1. Open the BIOS menu. see our story How to enter the BIOS If you still don’t know how to do this.

2. Select Boot Menu.

3. Select the BBS priority for UEFI NVMe drives.

Four. Set Boot Option 1 to Linux installation.

Five. Confirm the changes have been made, save and exit the BIOS.

6. The system will boot into GRUB, select Linux OS and press Enter. Letting GRUB sit for 10 seconds selects the default option (usually Linux).

7. Start Linux Desktop When Make sure everything is correct.
8. Restart GRUB When Select Windows to make sure everything is working.


